티스토리 뷰
Fast API 구축_1 에 이어서 이번에는 CURD가 가능한(데이터베이스를 사용) 형태로 구성해 보려 합니다!
CURD에 필요한 DB 선정은 MongoDB 를 사용하려고 해요, MongoDB를 사용하는 이유는 비동기식 데이터 처리를 지원하고 있기 때문에, Fast API 와 같이 비동기적 동작에 특화된 API 에 적용해 보려해요.
Fast API(Python) 에서 MongoDB 에 비동기적으로 사용하기 위한 라이브러리로 "Motor" 을 사용해 보도록 할께요!
Motor 설치 명령어
pip install motor
MongoDB 설치는 되어 있다고 가정하고 진행 할께요~!
MongoDB 를 이전 글에서 생성한 Fast API app에 적용해 보도록 할께요!
MongoClient.py
from pymongo import MongoClient

# MongoDB 클라이언트 생성
def create_mongo_client(host='localhost', port=27017):
    client = MongoClient(host, port)
    return client


# 데이터베이스와 컬렉션 선택
def get_database(client, db_name):
    db = client[db_name]
    return db

# 문서 삽입
def insert_document(collection, document):
    collection.insert_one(document);

# 문서 검색
def find_document(collection, query):
    document = collection.find_one(query)
    return document
test.py
- insert 예제를 실행하기 위해 /test/insert api 를 추가 하였어요.
from fastapi import FastAPI
import uvicorn
from pydantic import BaseModel

import MongoClient

app = FastAPI()

#MongoDB 클라이언트 생성
client = MongoClient.create_mongo_client()
db = MongoClient.get_database(client, "test_db") # test_db 데이터베이스 선택
collection = db['test_collection'] # test_collection 컬렉션 선택

# 데이터 모델
class Document(BaseModel):
    name: str
    age: int

@app.post("/test/insert")
async def insert_db(document: Document):
    # Pydantic 모델을 dict로 변환
    doc_dict = document.dict()
    MongoClient.insert_document(collection,doc_dict)
    return {"result":"ok"}

@app.get("/")
async def read_root():
    return {"Hello":"World"}

@app.get("items/{item_id}")
async def read_item(item_id: int, q: str = None):
    return {"item_id": item_id, "q": q}

if __name__ == "__main__":

    uvicorn.run(app, host="0.0.0.0", port=5000, log_level="info")
swagger 에서 insert 테스트를 진행 하면 정상적으로 성공되어요

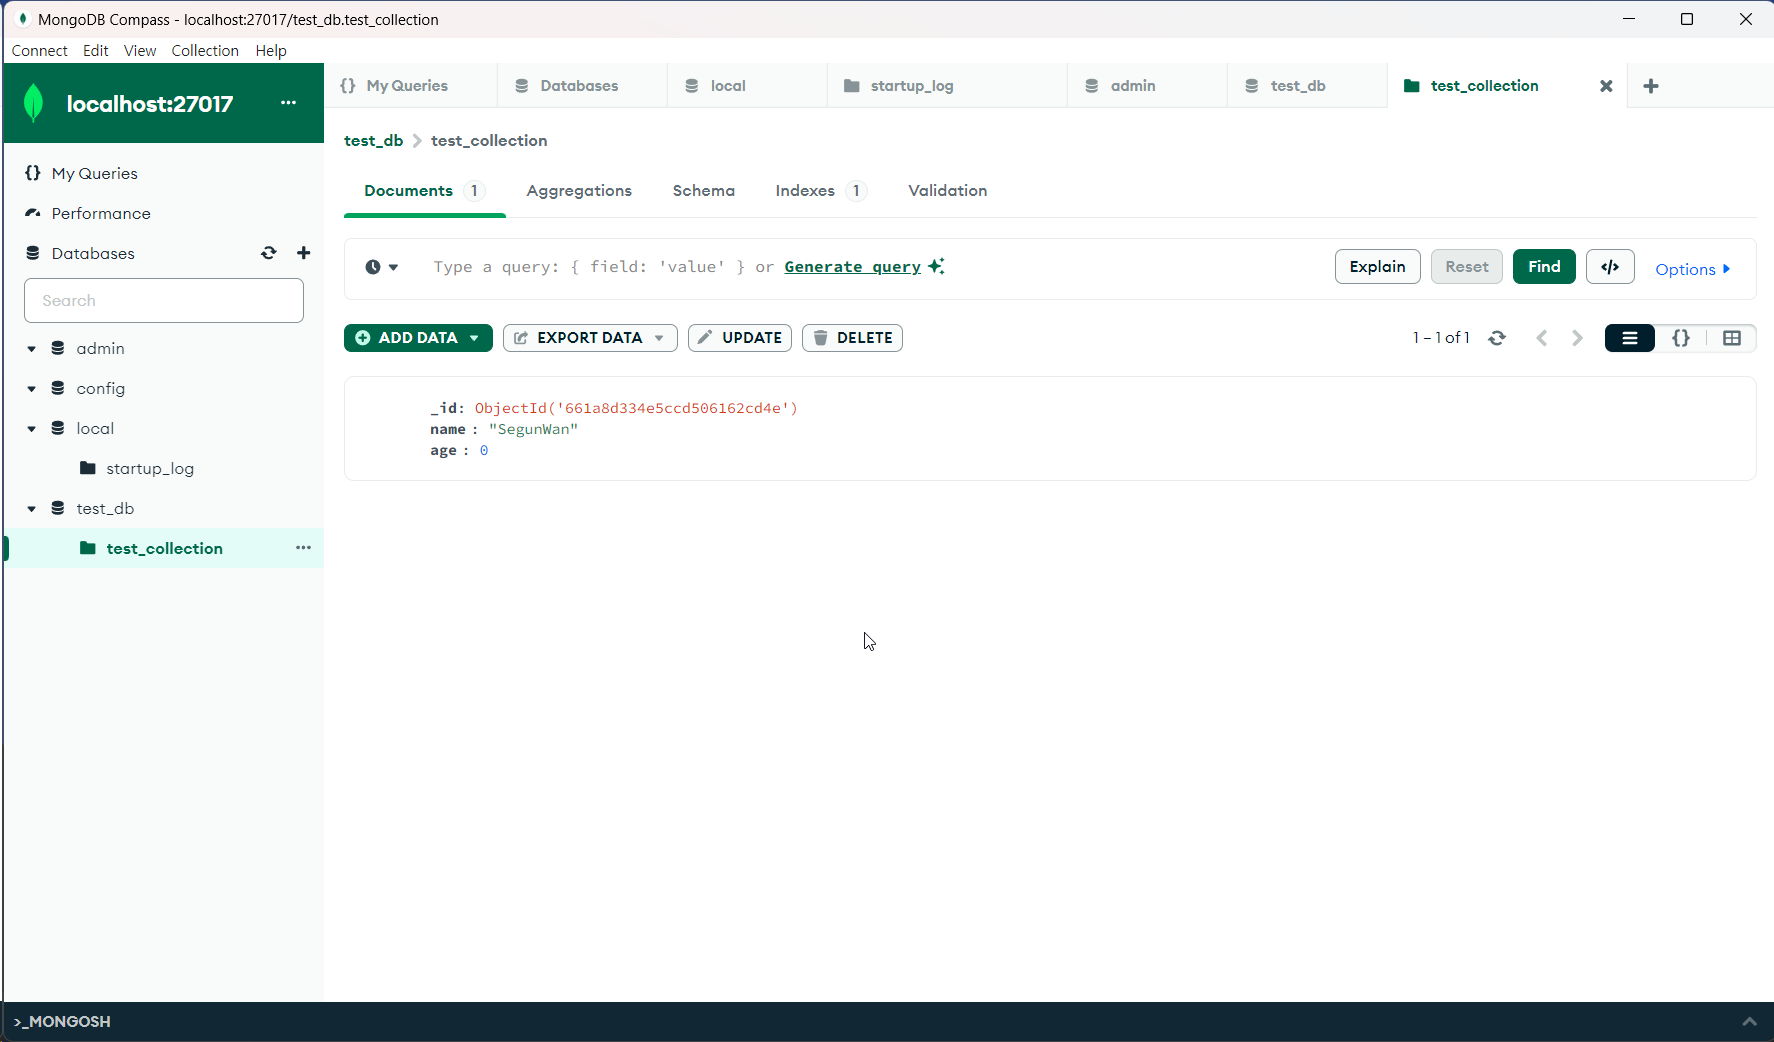
mongodb 를 확인해 보면 정상적으로 isnert 된 것을 볼 수 있어요

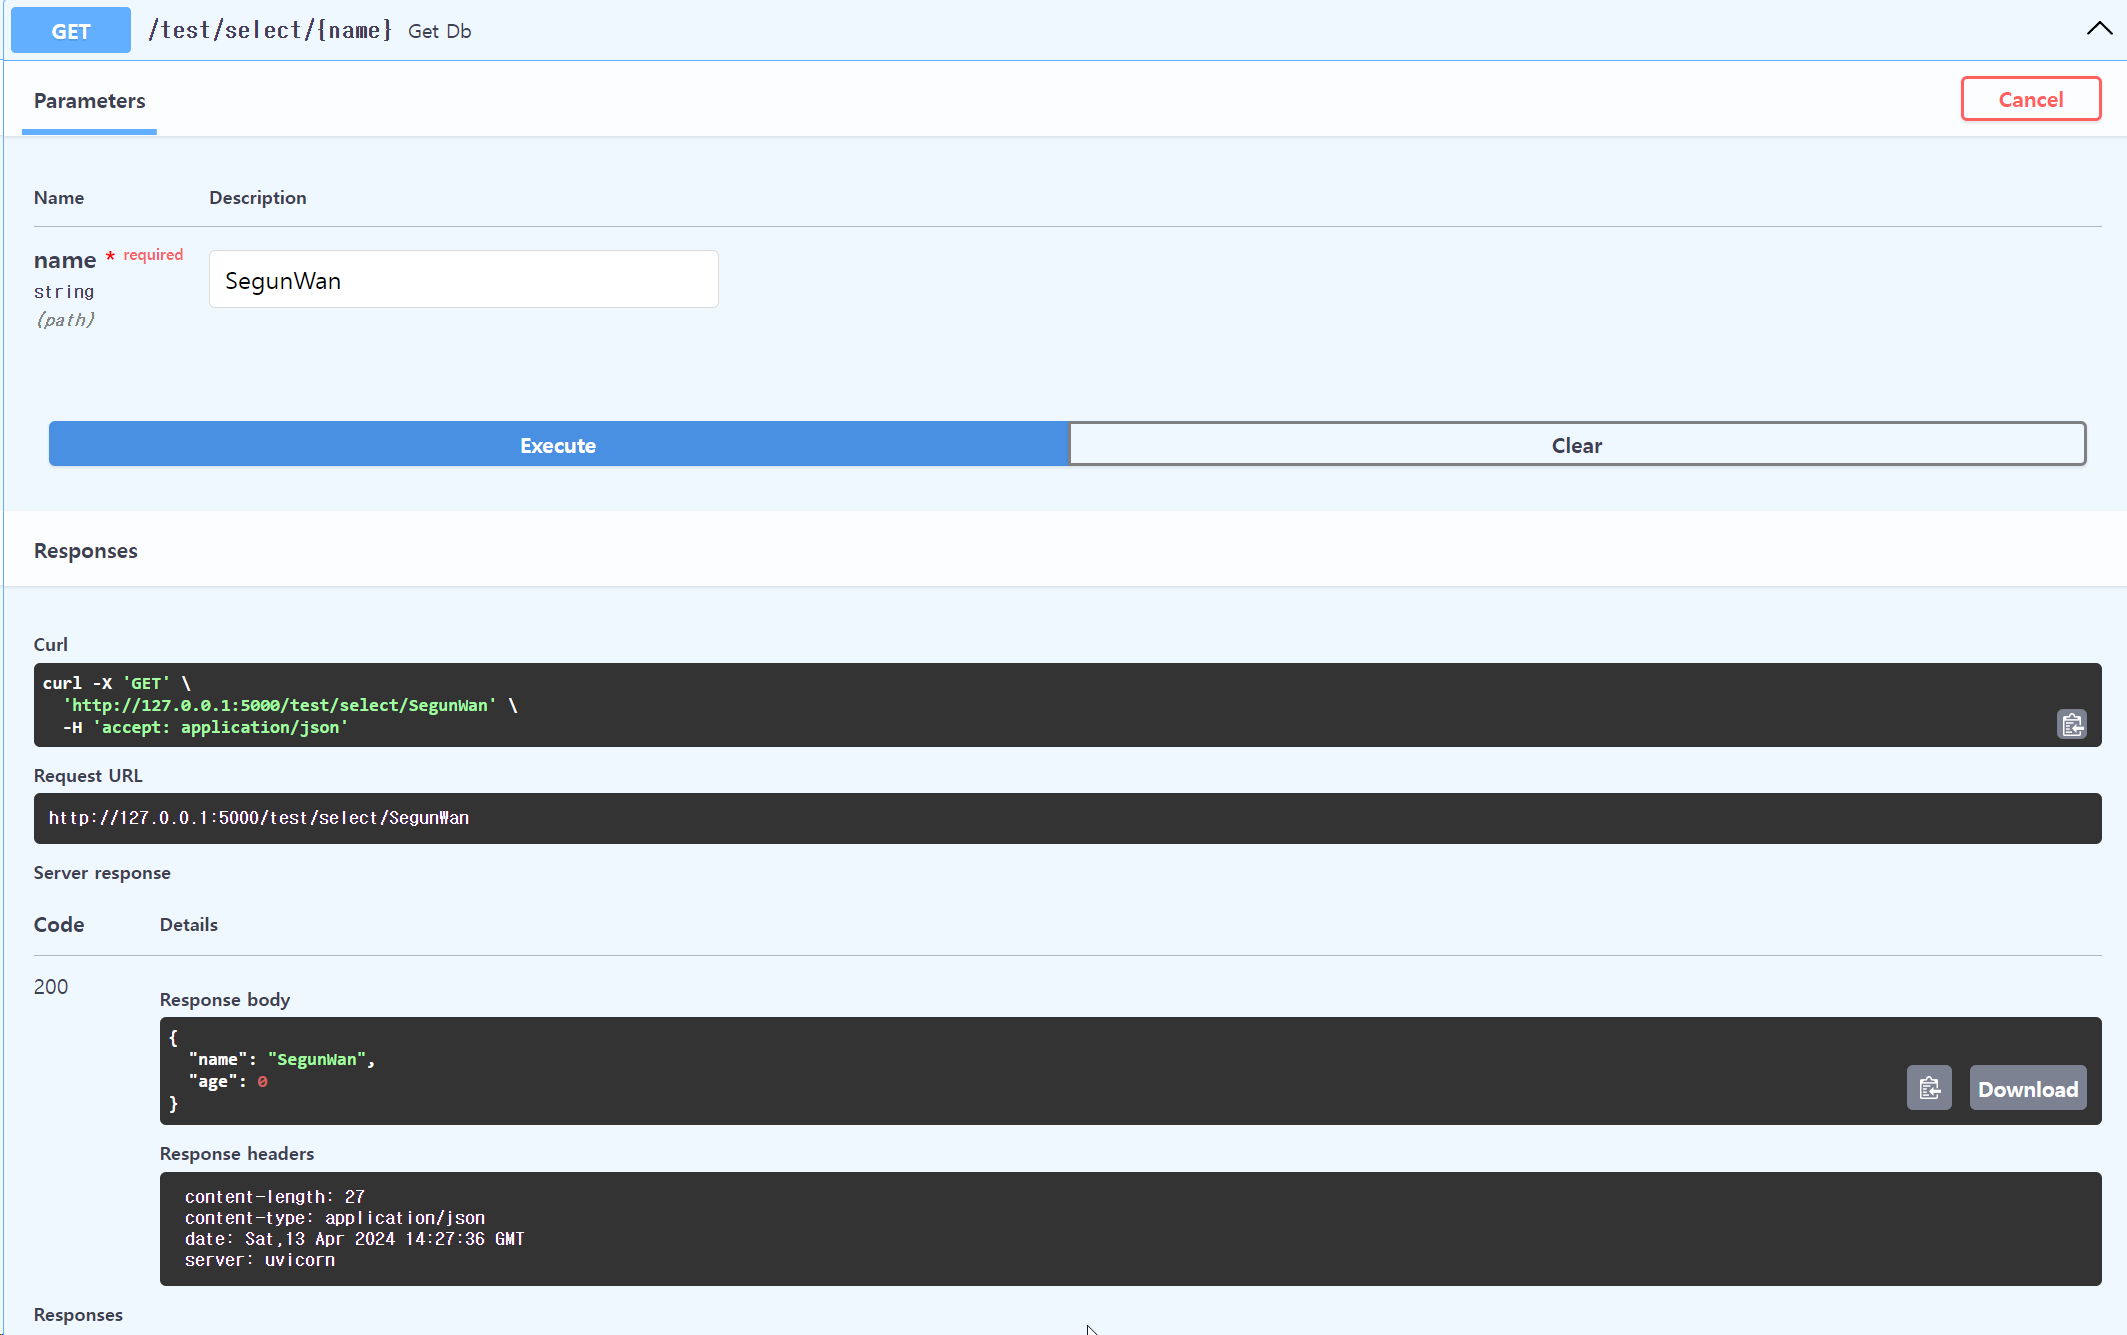
이제는 해당 데이터를 Read 하는 /test/select/{name} API 를 만들어 볼께요!
name 으로 document 를 찾는 예제에요, 조회결과가 없으면 404 응답을 주도록 코딩 하였어요!
@app.get("/test/select/{name}", response_model=Document)
async def get_db(name: str):
    document = MongoClient.find_document(collection,{"name":name})
    if document is None:
        raise HTTPException(status_code=404, detail="Documnet not found")
    return Document(name=document['name'], age=document['age'])
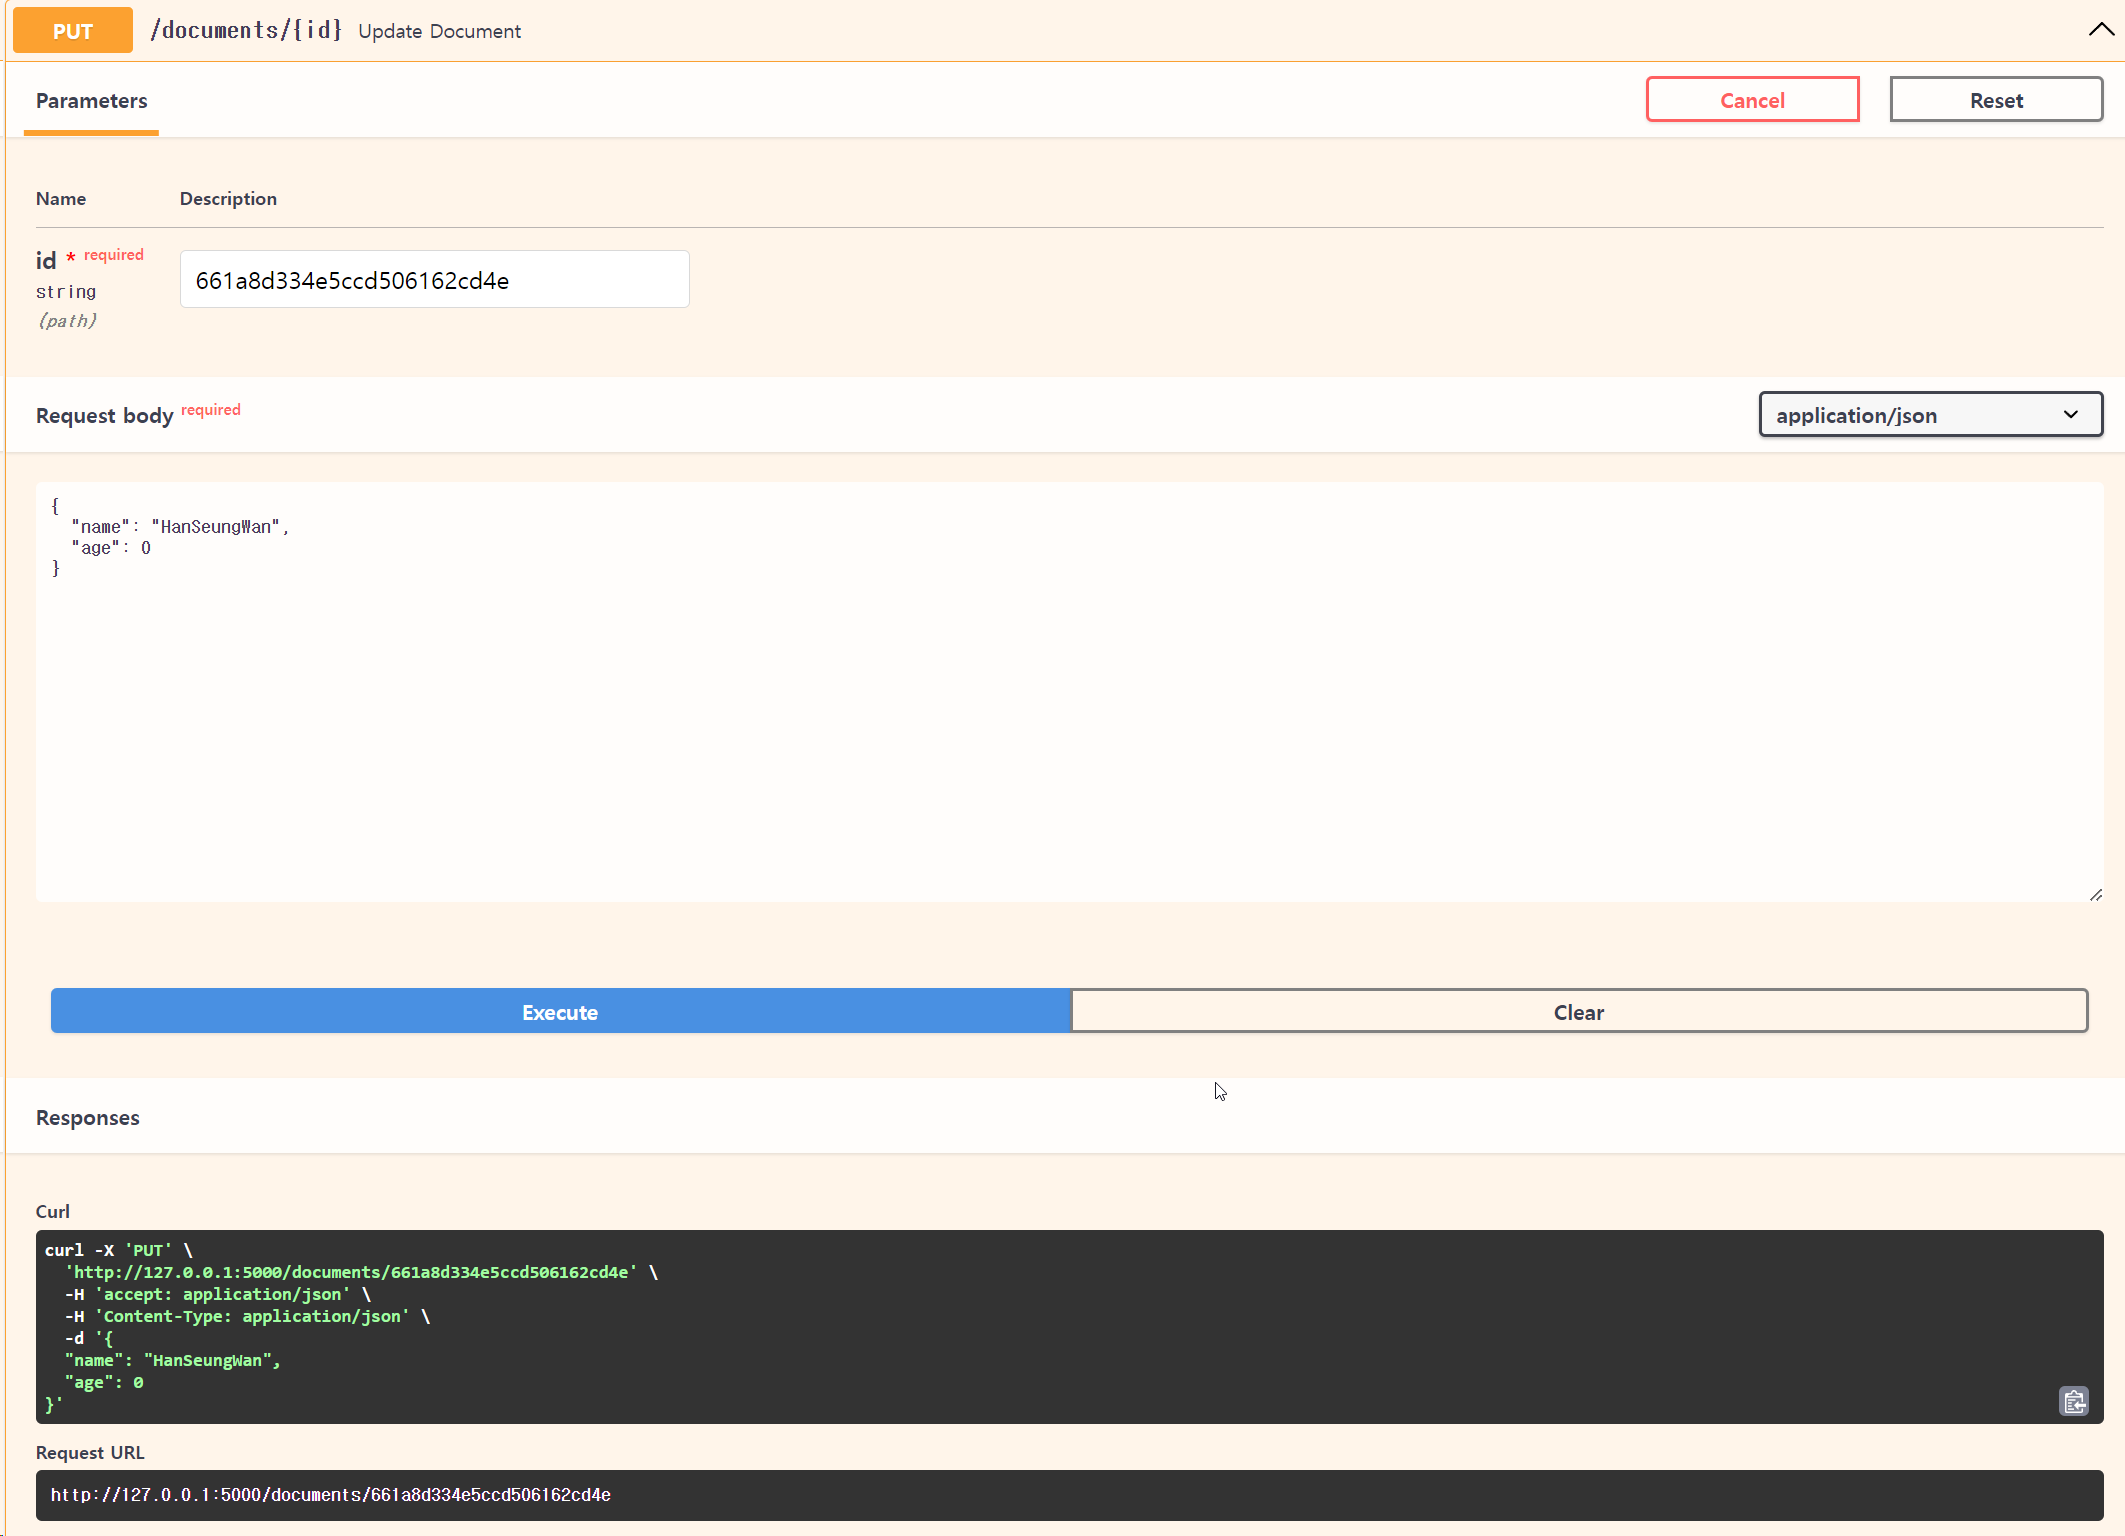
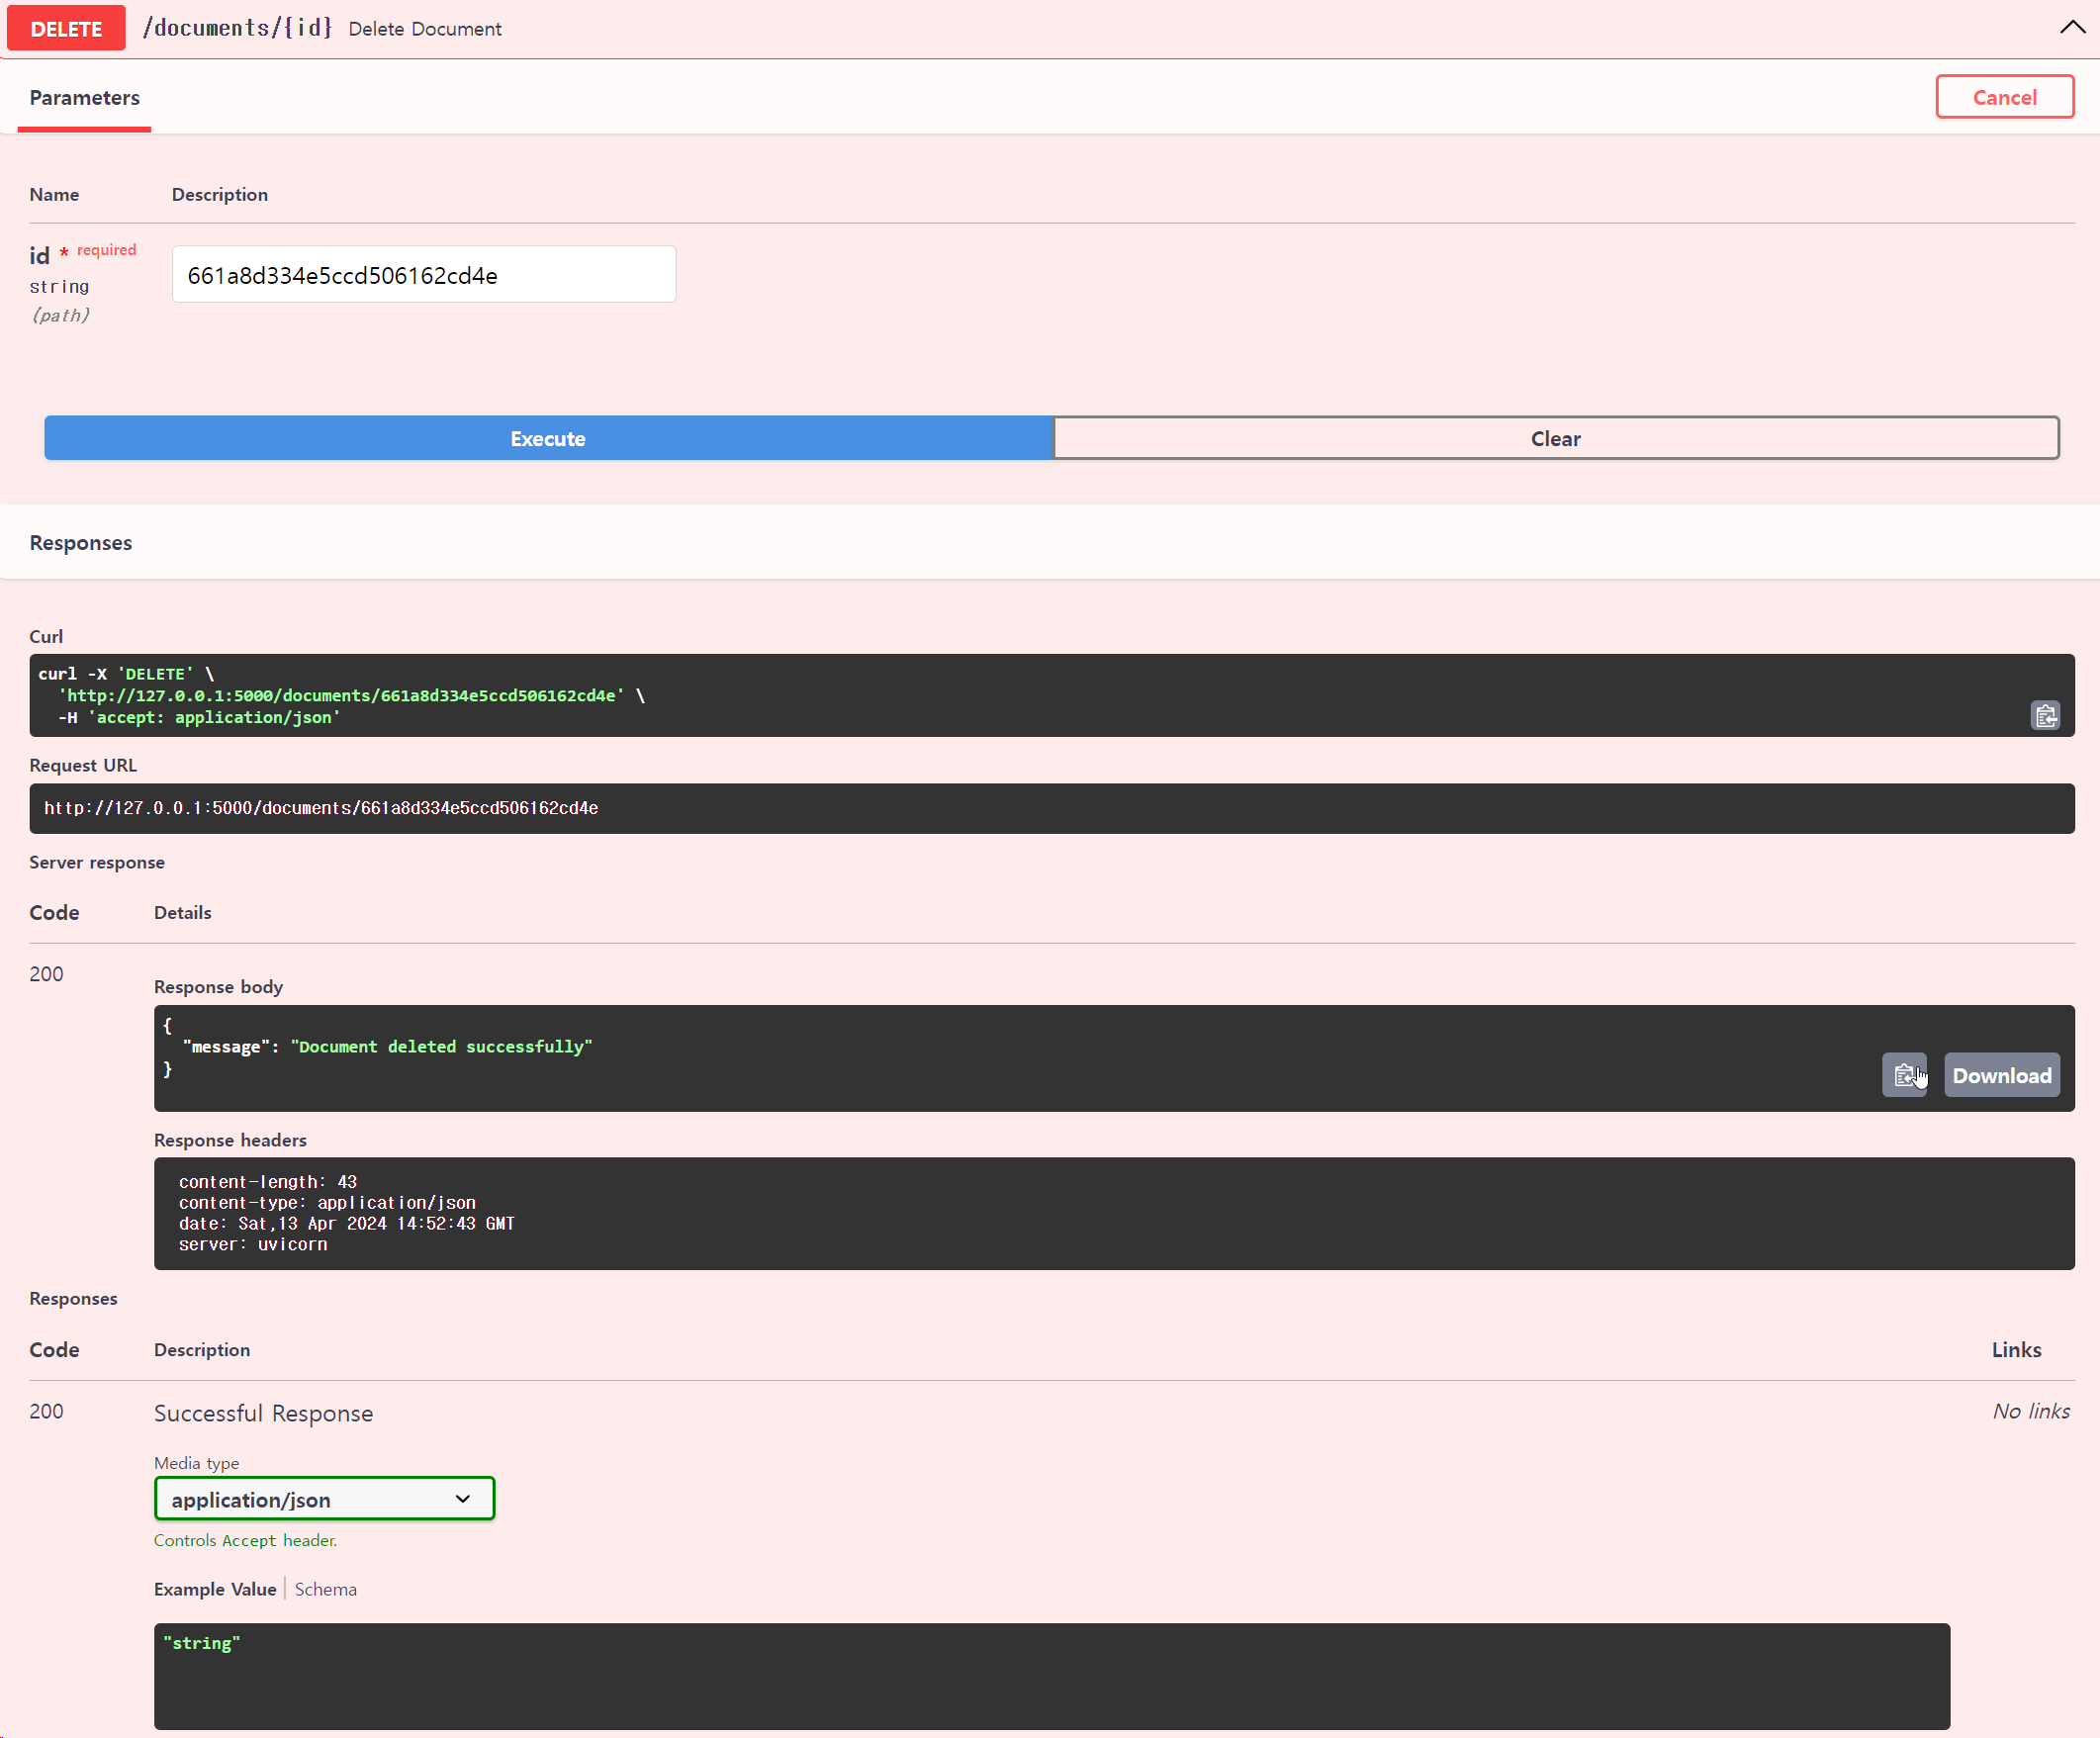
put, delete 는 한번에 진행해 볼께요!
put api 예제


delete api 예제


전체 코드
test.py
from http.client import HTTPException

from bson import ObjectId
from fastapi import FastAPI
import uvicorn
from pydantic import BaseModel

import MongoClient

app = FastAPI()

#MongoDB 클라이언트 생성
client = MongoClient.create_mongo_client()
db = MongoClient.get_database(client, "test_db") # test_db 데이터베이스 선택
collection = db['test_collection'] # test_collection 컬렉션 선택

# 데이터 모델
class Document(BaseModel):
    name: str
    age: int

@app.post("/test/insert")
async def insert_db(document: Document):
    # Pydantic 모델을 dict로 변환
    doc_dict = document.dict()
    MongoClient.insert_document(collection,doc_dict)
    return {"result":"ok"}

@app.get("/test/select/{name}", response_model=Document)
async def get_db(name: str):
    document = MongoClient.find_document(collection,{"name":name})
    if document is None:
        raise HTTPException(status_code=404, detail="Documnet not found")
    return Document(name=document['name'], age=document['age'])

@app.put("/documents/{id}")
async def update_document(id: str, doc: Document):
    # MongoDB에서 문서 업데이트
    update_result = collection.update_one({"_id": ObjectId(id)}, {"$set": doc.dict(exclude_unset=True)})
    if update_result.modified_count == 0:
        raise HTTPException(status_code=404, detail="Document not found or no update needed")
    return {"message": "Document updated successfully"}

@app.delete("/documents/{id}")
async def delete_document(id: str):
    # MongoDB에서 문서 삭제
    delete_result = collection.delete_one({"_id": ObjectId(id)})
    if delete_result.deleted_count == 0:
        raise HTTPException(status_code=404, detail="Document not found")
    return {"message": "Document deleted successfully"}

@app.get("/")
async def read_root():
    return {"Hello":"World"}

@app.get("items/{item_id}")
async def read_item(item_id: int, q: str = None):
    return {"item_id": item_id, "q": q}

if __name__ == "__main__":

    uvicorn.run(app, host="0.0.0.0", port=5000, log_level="info")
느낀점 :
정말 간단하고 쉽게 CRUD 가 가능한 API 를 생성 할 수 있었어요~! ChatGPT 도움을 받으니 정말 멋진 코드가 너무나 쉽게 만들어 졌네요!
다음에는 AI 관련 라이브러리를 활용하여 API 를 구현해 보도록 할꺼에요!
함께 따라하며, 근사한 AI API 를 만들어 보도록 노력해보아요.
감사합니다.
'python' 카테고리의 다른 글
| Fast API 구축_1 (2) | 2024.04.07 |
|---|---|
| theano 윈도우 설치 (0) | 2015.10.27 |
| 파이썬 Whl 파일 설치 (0) | 2015.10.20 |
| 파이썬 버전 확인 (0) | 2015.10.15 |
| 한글 형태소 분석기2 (0) | 2015.10.14 |
- Total
- Today
- Yesterday
- MSA
- data mining
- MQ
- fastapi
- 웹서비스
- 분산처리
- data crawling
- 테스트주도개발
- 켄트 백
- SpringBoot
- kafka
- Python #FastAPI
- nodejs
- 퀜트백
- GateWayApi
- TDD
- AWS
- 테스트
- EC2
- Python
- 테스트 주도 개발
- mongodb
- 웹개발
| 일 | 월 | 화 | 수 | 목 | 금 | 토 |
|---|---|---|---|---|---|---|
| 1 | 2 | |||||
| 3 | 4 | 5 | 6 | 7 | 8 | 9 |
| 10 | 11 | 12 | 13 | 14 | 15 | 16 |
| 17 | 18 | 19 | 20 | 21 | 22 | 23 |
| 24 | 25 | 26 | 27 | 28 | 29 | 30 |
| 31 |
